 how-to
How to Fix a Garage Door Spring: 2026 Guide
Table of Contents
- Signs of a Broken Garage Door Spring
- Garage Door Spring Safety Precautions Before You Start
- Garage Door Torsion Spring Tools You Need
- How to Measure and Identify Your Garage Door Spring
- Step-by-Step: How to Fix a Garage Door Spring
- Spring Lifespan, Cycle Ratings, and Disposal
- Garage Door Spring Replacement Cost: What to Expect
- Conclusion
Last Updated: August 25, 2026
Garage door springs are under enormous tension, enough to cause serious injury or death if handled incorrectly. This guide from American Eagle Garage Doors LLC walks you through how to fix a garage door spring safely, covering everything from identifying the failure type to winding a new torsion spring and running a post-installation check. If at any point the process feels beyond your skill level, stop and call a professional. Some repairs genuinely aren't worth the risk.
Below, we cover the exact steps most DIY guides skip: measuring wire gauge, identifying coil direction, understanding cycle ratings, and disposing of old springs correctly.
Signs of a Broken Garage Door Spring
A broken garage door spring announces itself unmistakably. The most obvious is a loud bang, often described as a gunshot, that's the sound of a spring snapping under high tension. After that, the door either won't open at all or feels impossibly heavy when you try to lift it manually.
Other signs include:
- The door opens a few inches and stops, straining against the opener
- Visible gap in the torsion spring coil (a clean break in the middle of the spring)
- Cables hanging loose or piled on the floor near the bottom bracket
- The door looks crooked or uneven when moving
Torsion Spring Failure vs. Extension Spring Failure
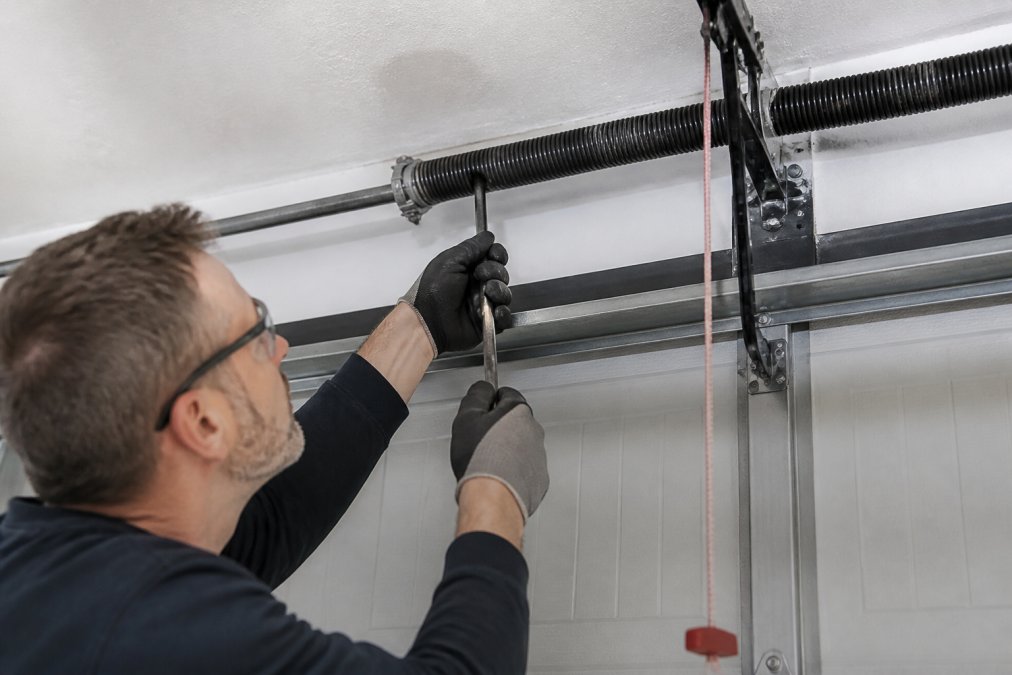
Torsion springs mount horizontally above the door opening along a metal shaft. When a torsion spring fails, you'll typically see a visible split in the coil. The door will feel extremely heavy because the counterbalance system is no longer functioning.
Extension springs run along the horizontal tracks on each side of the door. When an extension spring breaks, one side of the door drops lower than the other, and you may see the spring hanging loose or lying on the track. Extension spring systems use safety cables threaded through the center of each spring; if those cables are missing, a snapped spring can fly across the garage at high speed.
The repair process differs significantly between the two types. Torsion springs require winding bars and precise torque application. Extension springs are somewhat more forgiving but still carry real risk.
Garage Door Spring Safety Precautions Before You Start
Torsion springs store enough mechanical energy to cause permanent injury. Read these precautions before touching anything.
- Disconnect the opener. Unplug the garage door opener from the power outlet. Do not rely on the wall switch alone.
- Wear safety glasses. A snapping spring or flying set screw can cause permanent eye damage.
- Use proper winding bars only. Never use screwdrivers, pliers, or rebar as substitutes. Winding bars must fit the winding cone holes exactly; improvised tools slip and cause injuries.
- Clamp the door. After manually releasing the door to the closed position using the manual release cord, clamp locking pliers to the track just below the bottom roller. This prevents the door from flying up unexpectedly.
- Never stand directly in front of the winding cone while winding or unwinding a spring.
- Check safety cables on extension springs. If your extension springs don't have safety cables threaded through them, install them before doing anything else.
As noted by the U.S. Consumer Product Safety Commission's home safety resources, garage door systems are among the largest moving mechanical assemblies in a home and require careful handling.
Garage Door Torsion Spring Tools You Need
Getting the right tools before you start saves time and prevents dangerous improvisation mid-repair.
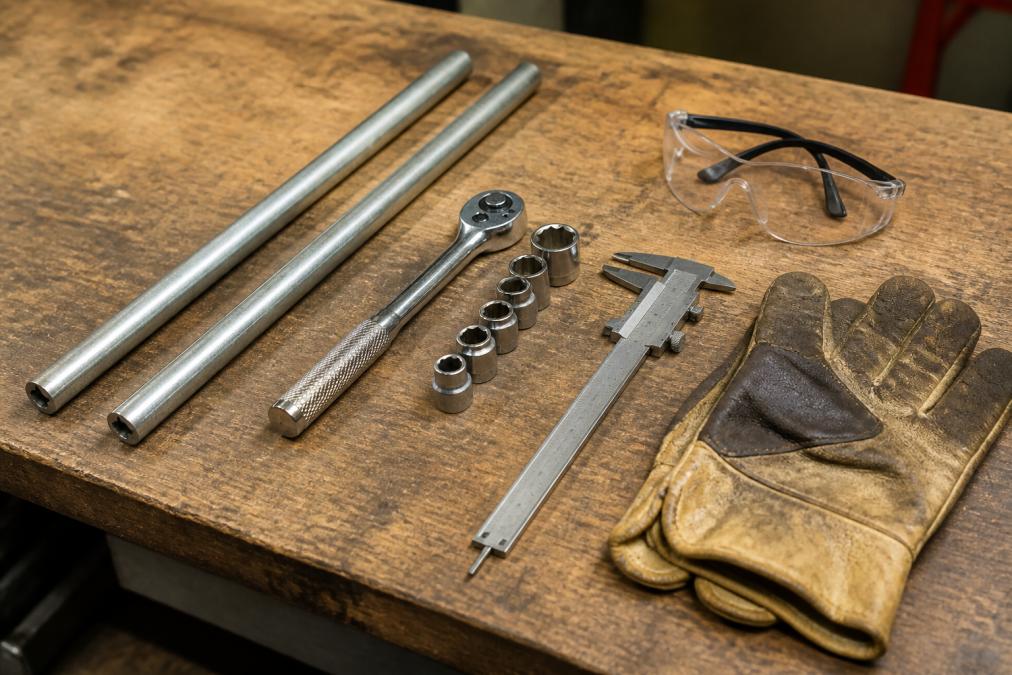
Here's what you need for a torsion spring replacement:
| Tool | Purpose |
|---|---|
| Two winding bars (matching cone size) | Winding and unwinding the spring safely |
| Socket wrench with extension | Loosening set screws on the winding cone |
| Digital calipers | Measuring wire gauge and inside diameter |
| Tape measure | Measuring spring length and coil count |
| Locking pliers (C-clamps) | Securing the door in place during repair |
| Safety glasses | Eye protection from flying debris |
| Leather work gloves | Hand protection |
| Ladder | Accessing the spring above the door |
| Marker or tape | Marking winding positions |
You need two winding bars, not one. Attempting to wind a spring with a single bar means you have no way to safely transfer tension between positions. This is where improvised tools enter the picture, and where injuries happen.
How to Measure and Identify Your Garage Door Spring
Ordering the wrong spring is the most common mistake DIYers make. Spring dimensions are precise, and even a small error in wire gauge or length will result in a door that won't balance correctly.
To measure a torsion spring, you need four values:
- Wire gauge (diameter of the wire itself)
- Inside diameter of the spring
- Length of the spring (measured end to end)
- Coil direction (left-wound or right-wound)
Use digital calipers for wire gauge and inside diameter; a tape measure isn't accurate enough for these measurements.
Visual Identification Guide for Wire Gauge
Wire gauge is the single most misidentified dimension in DIY spring replacement. To measure correctly: place the caliper jaws against 10 consecutive coils of the spring and measure that total length. Divide by 10 to get the wire diameter. Common wire gauges for residential doors range from roughly 0.207 inches for lighter doors up to 0.273 inches for heavier two-car doors.
A thicker wire gauge means a higher spring rate, which means more torque per turn during winding. Ordering a spring with the wrong wire gauge throws off the entire counterbalance system.
Coil Direction: Left-Wound vs. Right-Wound
Stand facing the door from inside the garage. Look at the winding cone end of the spring.
- Right-wound spring: The coils wind clockwise when viewed from the winding cone end. This spring sits on the left side of the center bearing bracket.
- Left-wound spring: The coils wind counter-clockwise from the winding cone end. This spring sits on the right side.
On a standard two-spring system, you'll have one of each. Getting this wrong means the spring will work against the door's movement rather than counterbalancing it.
Step-by-Step: How to Fix a Garage Door Spring
Fixing a garage door spring requires patience and strict sequencing. Skipping steps or rushing the winding process is where injuries occur.
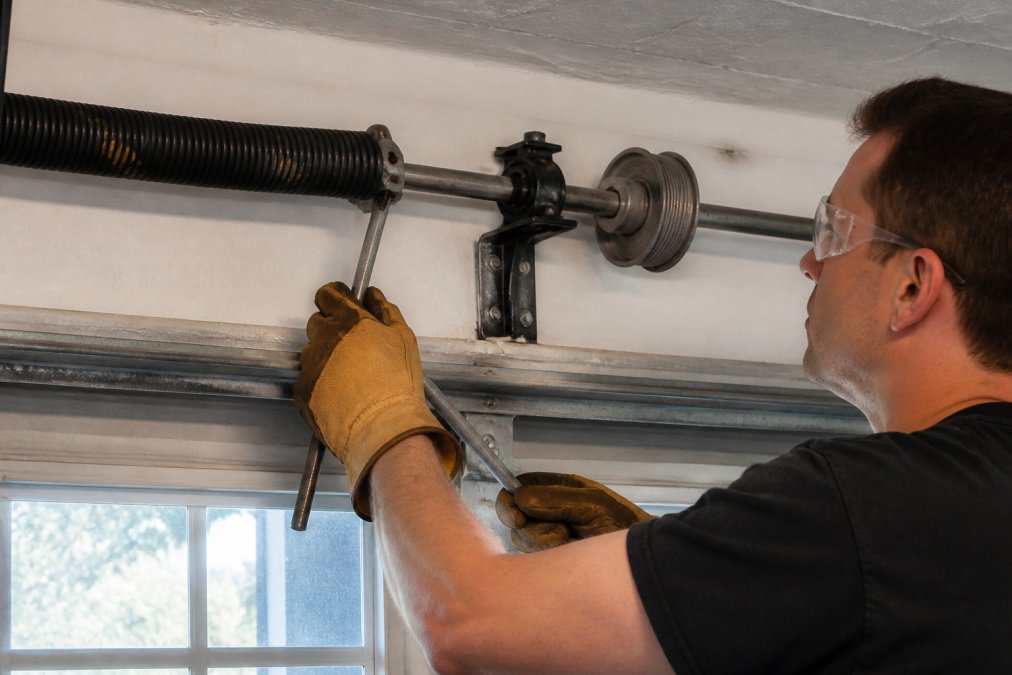
Step 1: Disconnect Power and Secure the Door
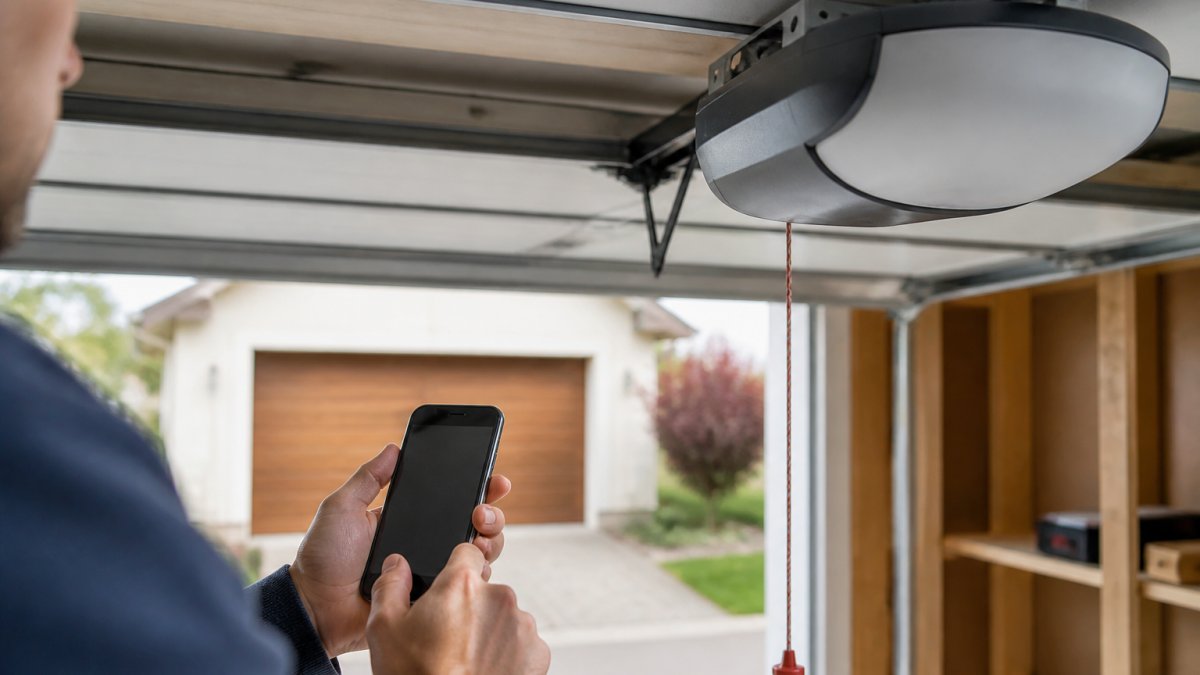
Unplug the garage door opener. Pull the manual release cord (usually a red handle hanging from the trolley) to disconnect the door from the opener carriage. Lower the door manually to the fully closed position. Clamp locking pliers onto the vertical track just above the bottom roller on both sides to prevent the door from moving during the repair.
Step 2: Remove the Damaged Spring
Loosen the set screws on the winding cone using your socket wrench. Insert a winding bar into one of the winding cone holes. Hold the bar firmly and loosen the remaining set screws. Carefully unwind the spring by rotating the bar in small increments, transferring to the second bar at each quarter turn. Count the turns as you unwind; you'll need this number when winding the new spring.
Once fully unwound, slide the spring off the torsion bar toward the center bearing bracket.
Step 3: Install and Wind the New Torsion Spring
Slide the new spring onto the torsion bar with the stationary cone facing the center bracket. Secure the stationary cone to the center bearing bracket. Reconnect the cable drum and reattach the lift cables.
Insert the winding bar and begin winding. The standard winding formula for most residential doors is approximately one quarter-turn per foot of door height; a 7-foot door typically requires around 28 to 30 quarter-turns, but this varies by spring rate and door weight. Wind in small increments, alternating winding bars at each quarter-turn. Once fully wound, tighten the set screws firmly against the torsion bar.
Apply a light coat of lubricant to the coils. According to the International Door Association's technical resources, proper lubrication significantly extends spring cycle life and reduces operational noise.
Step 4: Test Door Balance and Run a Post-Installation Safety Check
Remove the locking pliers from the tracks. Manually lift the door to waist height and release it. A properly balanced door will stay in place or drift very slowly in either direction. If it drops sharply, the spring needs more tension. If it shoots upward, reduce tension by unwinding a quarter-turn.
Run the post-installation safety check:
- Door stays stationary at waist height when released manually
- Door moves smoothly without jerking or grinding
- Both cables sit evenly in the cable drum grooves
- Set screws are fully tightened against the torsion bar
- No visible gaps or distortion in the new spring coil
- Opener reconnected and auto-reverse safety feature tested
- Manual release cord operates correctly
Spring Lifespan, Cycle Ratings, and Disposal
Torsion springs are rated by cycle life, where one cycle equals one complete open-and-close of the door. Standard residential springs are typically rated for 10,000 cycles. High-cycle springs are available in 25,000, 50,000, and even 100,000-cycle ratings; these cost more upfront but last significantly longer for households that use the garage door frequently.
A household that opens and closes the door four times per day will go through roughly 1,460 cycles per year. At that rate, a standard 10,000-cycle spring lasts approximately seven years. A 25,000-cycle spring extends that to around 17 years.
If you're replacing a broken spring, consider a high-cycle upgrade rather than replacing like-for-like. The difference in spring cost is often modest compared to the labor cost of another replacement in a few years.
Disposal of old springs: Old torsion springs are steel and can be recycled at most metal recycling facilities. Do not place them in standard household recycling bins. Check with Earth911's recycling locator to find a nearby metal recycler that accepts steel components.
Garage Door Spring Replacement Cost: What to Expect
Garage door spring replacement cost varies based on spring type, cycle rating, number of springs, and whether you hire a professional or handle the repair yourself.
DIY spring replacement means paying only for parts. Torsion springs vary in price depending on wire gauge, length, and cycle rating. Factor in winding bars if you don't already own them.
Professional replacement includes labor, the correct parts, and the assurance that the spring is wound to the correct tension. Most professionals will also inspect the cables, cable drum, and center bearing bracket while the spring is off the door, catching small problems that prevent larger failures later.
At American Eagle Garage Doors LLC, free estimates are available so you know exactly what you're paying before any work begins. Many homeowners find that after pricing out parts and tools for a DIY repair, professional service is closer in cost than expected, with the added benefit of a properly tensioned spring and a safety check performed by someone who does this daily.
Garage door springs sit under extreme tension, and a failed repair creates real safety hazards for everyone in the household. If your measurements don't add up, the door won't balance correctly, or you're not comfortable winding under load, the right call is to bring in a professional. American Eagle Garage Doors LLC specializes in spring replacements for both residential and commercial doors, offering free estimates, prompt service, and the kind of finished result that lasts. Call us today to get your door operating safely and correctly.
Frequently Asked Questions
Can you fix a garage door spring by yourself?
Replacing a torsion spring is possible as a DIY project, but it carries serious injury risk. Torsion springs store extreme tension, and improper winding or handling can cause the spring to snap violently. Extension springs are somewhat less dangerous but still require safety cables to be in place. If you have no prior experience with the counterbalance system or winding bars, hiring a professional is the safer choice. A broken garage door spring repair done incorrectly can damage the door, opener, or cause personal injury.
What are the signs of a failing garage door spring?
The most obvious sign is a loud bang from the garage, which usually means the spring has snapped. Other signs include a door that only opens a few inches before stopping, visible gaps in the torsion spring coils, cables hanging loose off the cable drum, or a door that feels extremely heavy when lifted manually. A door that moves unevenly or jerks during operation can also indicate a worn spring nearing the end of its cycle life.
Can you lift a garage door with a broken spring?
You can lift a garage door manually with a broken garage door spring, but it will be very heavy without the counterbalance system working. A standard residential door can weigh between 130 and 400 pounds. Attempting to lift it alone risks injury or dropping the door. If you must open the door, use the manual release cord to disengage the opener, then lift with a second person and use locking pliers or C-clamps on the track to hold it open safely.
How much does garage door spring replacement cost?
Garage door spring replacement cost varies based on spring type, door size, and labor rates in your area. Torsion springs generally cost more than extension springs due to the complexity of installation. The total price depends on whether you need one or two springs replaced and the cycle life rating of the replacement parts. For an accurate estimate with no obligation, contact a local garage door professional. American Eagle Garage Doors LLC offers free estimates, so you know the cost upfront before any work begins.
This article was written using GrandRanker